Posts Tagged ‘tilt-shift’
Tilt-Shift Lenses for Portrait Photography
Introduction
Here at the Photography Community Blog we already have a great resource for those just starting out with tilt-shift photography, so be sure to check out Tilt-Shift Basics With the Canon TS-E 17mm F/4.
I will say that even after reading the basics post above, I was still very confused when I first picked up a tilt-shift lens. I’ve always used autofocus lenses on my DSLR, and a Canon tilt-shift lens is full of additional switches and levers that can challenge even an experienced photographer. I will try to simplify it as much as possible for new users.
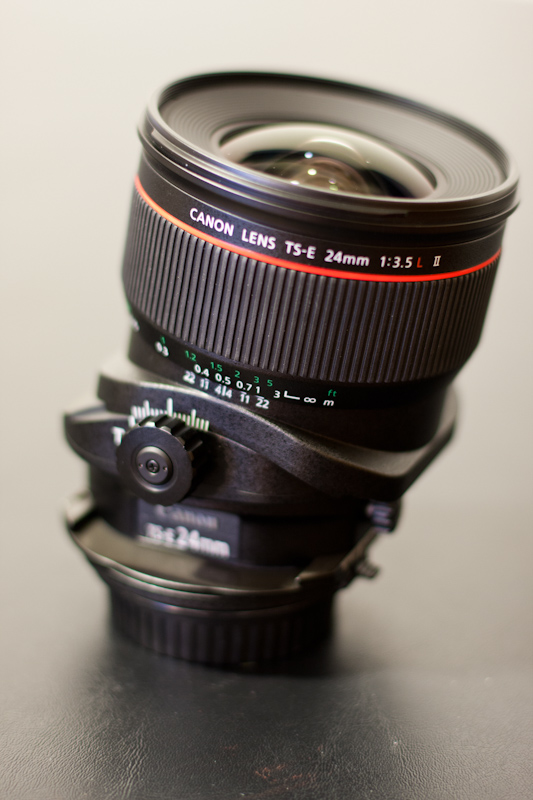
I rented the Canon TS-E 24mm f/3.5 L II for a few weeks thanks to the Photography Stack Exchange Rental Program, and that is what you will find outlined in this post. The two main important dials are the tilt and shift dials. Each motion also has a secondary dial to prevent free movement, or at least constrain it. This helps once you have found the amount of tilt or shift that you want in an image, because it prevents further movement. Near the tilt secondary dial, also you will find a locking switch, which I only used during transport. Further, you will find latches that allow you to rotate either the front elements or the entire lens on the camera body. This allows you to rotate your adjustment of tilt or shift independently of the camera and each other. This is confusing at first but will make sense once you start to play with each movement.
Movements of the TS-E 24mm f/3.5 L II:
- Tilt
- Tilt Lock
- Shift
- Shift Lock
- Lens Rotation Switch
- TS Rotation Switch
If you are keeping count, that is 6 pieces that are either switches or dials, and that isn’t even counting the focus ring. It becomes easy to understand why a tripod is highly recommended. If you have to manual focus and alter potentially 6 different pieces on the lens to get the shot, then it will take some time and careful coordination. Specifically if you are trying to do portrait photography, this becomes even more of a burden, which I will detail below more.
My Tilt-Shift Experience
I rented the Canon TS-E 24mm f/3.5 L II with the intention of testing it out for portrait photography. I am on an APS-C (1.6x) sensor, so the effective focal length of 38mm is a bit wide for portraits, but I still felt this would be acceptable for my tests. I also wanted this lens because, optically speaking it is considered to be one of the highest quality wide angle lenses that Canon has ever produced.
The lens is heavy at 27oz, and has an 82mm filter thread, but the build quality is very impressive overall. I have used other “L” series lenses, but very few can match the TS-E 24mm II in the quality of materials used or the fit and finish. It is hard to describe exactly the great feel, but “solid” best summarizes this lens. The focus ring is especially nice, and seems to be manufactured to exacting standards in a way that no other focus ring I have used has been. This is very important when you are using a manual focus only lens.
Being that this was my first experience with a manual focus only lens, I typically don’t pay much attention to focus throw or the exact precision in adjustment that the focus ring allows. This lens was a dream to use in manual focus, allowing me to fine tune to my desire. I never felt limited by the manual focus, especially when I was using Live View mode at 10x magnification. The actual movement of the focus more smooth and heavy then any other lens I have used. It was smooth to operate, but once I found the position I wanted it always settled perfectly.
I rented the lens for three weeks, which is about the minimum amount of experience I would recommend for anyone to be somewhat comfortable behind one of these specialty lenses. I certainly did not exhaust the possibilities with the lens, but I also am comfortable enough now that I can pick it up and achieve the expected results.

Tilt-Shift For Portraits
I have seen an increasing trend in the amount of portrait photographers that are using tilt-shift lenses for weddings, senior portraits, and general portraiture. One such great example that I looked to for inspiration is Jeff Newsom. I looked around for general information on how to achieve this best and other peoples experiences but could not find much at all. I think for the most part this is still a developing trend that many people are not fully comfortable discussing because they aren’t quite sure what works either.
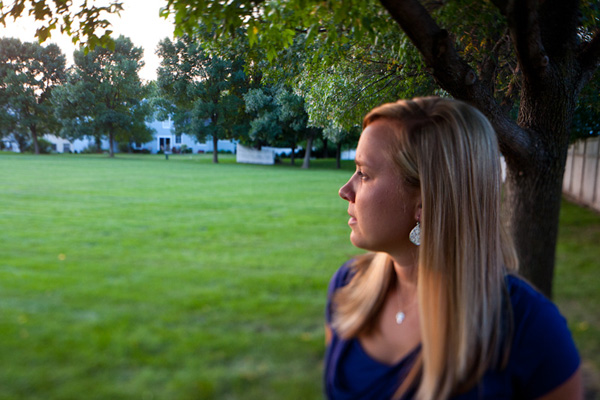
When I viewed images created with tilt-shift lenses for portraits, the part of the technique that I liked was the ability to tilt the focus plane. Being able to more selectively and creatively position the out of focus areas of an image allows the photographer to draw attention to specific areas of the image that isn’t always possible by modifying the aperture, focal length, or composition.
The first thing to recognize, as pointed out in this answer by Stan Rogers, is that using a tilt-shift lens to minimize the plane of focus is really not the reason that tilt-shift lenses are designed. They are instead made to maximize it and to correct distortion issues. So technically speaking, the way that I am trying to use a tilt-shift lens for portraits can be considered out of the typical range of use, but it is photography and it is art, so anything is fair game as far as I am concerned. I will say that I brought that using a tilt-shift lens in this way is atypical in the Photography Stack Exchange Chat room and at least one other person believes that tilt-shift lenses today are used broadly for creative focus. At least in my own research, I found it difficult to find others that used TS lenses for portraiture and also shared how to do so. I also found that Canon and other technical documents on tilt-shift lenses only really spoke to how to use them to correct for distortion and gain a greater depth of field. So regardless of what exact purpose the tool is designed for, I think it is safe to say that tilt-shift lenses are used in a wide range of photography.

The technique that I actually use to take tilt-shift portraits is actually very simple, considering the amount of controls found on a tilt-shift lens. I tilt my lens to the maximum tilt of either +/-8.5° and stop down to my maximum aperture of f/3.5. Depending on my subjects, I also may alter the orientation of the tilt portion of the lens from the standard to perpendicular. I find that for groups the perpendicular orientation works best and for one or two close up subjects the standard vertical orientation works best. If your lens has the option, something between the 90° and 0° rotation might even be better, if your subject is better suited to that focus plane.
Note that I do not make any adjustments to the shift portion of the lens for portrait photography. The shift portion of the lens is used for perspective control and does not alter the depth of field or focus plane creatively as I desire.
Focusing can be done initially so I at least can see the subject through the lens, but after tilting and orientation changes, I also make any final focusing adjustments right before capturing the image. Beyond focusing through the viewfinder, another option is to use live view on modern DSLR cameras. I opted for live view focusing the majority of the time, but also discovered an issue with doing so. Typically when I wanted to achieve sharp focus with live view, I would use full live view zooming to aid in focusing. This only focused on the center of the image. But with a focal plane that isn’t necessarily perpendicular across the frame at a single distance, focusing and recomposing becomes very difficult or impossible. Due to this, many times I would have to focus using the viewfinder and even then, was guessing if I had the correct focus. Again, this is where you would benefit a great deal from using a tripod, but that does not always make sense when shooting portraits.
Conclusions
Overall, shooting portraits on a tilt-shift lens can be rewarding due to the amount of creativity and depth of field control. It is very challenging especially when you have moving subjects(human), many controls to modify on the lens, and are required to shoot without a tripod. The TS-E 24mm f/3.5 L II is a dream to work with, it is a precise instrument, always performing exactly how I anticipated and with excellent image quality. 24mm is somewhat tight even on an APS-C sensor for portrait work, but I wouldn’t think twice about using this focal length and lens again for such purposes.

Tilt-Shift Basics With the Canon TS-E 17mm F/4
Thanks to the Gear Lending Library, I got the chance to try a tilt-shift lens for the first time. Considering myself a wide-angle shooter, I decided to go with the Canon TS-E 17mm F/4 which is the widest tilt-shift lens currently in production. It is also one of the most complex lenses to control since it has 5 inter-related degrees of freedom.
Tilt-Shift Basics
A tilt-shift lens, as obvious as it may seem is a lens which can both tilt and shift. It is possible to have lenses which does one or the other but the major lens makers don’t make such thing. To show what his means, lets start with the shift and my living room.
Just below on the left is an image taken with the camera level and the lens in its unshifted position. Now suppose that the couch near the camera was glued to the floor (it feels that way at least) but I wanted an unobstructed view of the window. With a normal lens, all it takes is to tilt the camera up. The result is what you see in the middle. While we no longer see the cough, the room shows some severe perspective distortion, also known as converging verticals. With a tilt-shift lens, there is another possibility meant exactly for this situation: Simply shift the lens upwards. This avoids converging verticals, as seen on the right, because the camera is still level, only the lens has moved up.


The shift feature is extremely useful of architecture photography where it is important to keep the geometry of buildings looking real.
The tilt feature allows to tilt the lens to an angle relative to the camera. What this does it tilt the focus plane. With a normal lens, the focus plane is always parallel to the camera, meaning that everything at a certain distance is in focus. By tilting the focus plane, this no longer holds. Specifically, everything in focus still lies on a plane by that plane is no longer parallel to the camera sensor.
It is hard to conceive and results are sometimes surprising since the plane of focus tilts by an angle which depends on the focal-length, focus-distance and tilt-angle as illustrated in the answer to this question. In the case of the TS-E 17mm F/4, the tilt-angle moves ±6.5°. To illustrate what happens as the lens is shifted, here is a demo of the lens being shifted in 1° intervals.

Note thatf at one point, the plane of focus coincides with the angle of the book faces. At the other extreme, the depth-of-field appears extremely shallow because the focus plane is tilted away from the books.
One artifact which may be limited to some tilt-shift lenses is that changing tilt cause a shift of the angle-of-view. Another member confirmed this is also the case for the Canon TS-E 24mm F/3.5 lens.
Using The Canon TS-E 17mm F/4
Tilt-shift lenses are completely manual except for aperture control which is done by the camera. Tilt and shift have to be controlled manually and so does focus. Now, because the effect of tilt and shift are direction dependent, Canon offers 2 additional controls on their TS-E lenses. One is the lens angle which can be rotated entirely around its optical axis. The second is another rotation between the tilt and shift component. This allows the direction of tilt and shift to be changed relative to each other.
One thing learned early on with the TS-E 17mm is that focus changes with just about any change. Therefore, focus should really be set last among all 5 degrees of freedom. However, before starting to setup the lens, you must meter the scene. To do that, point the camera at the subject with the lens in normal position and take a reading. Adjust to taste and dial those in Manual mode. This is important because once the lens is tilted or shifted, metering no longer works properly and can under-expose by over 3 stops.
The first degree to set should be the rotation of the entire lens. It controls in which direction the shift will occur. A vertical shift is good to avoid converging verticals and a horizontal shift for converging horizontals. Keep the shift plane at an angle is also possible and correct both but since motion is becomes related you have to keep repositioning the camera which gets annoying. Still it eventually works as illustrated in this example which used a 30° angle from horizontal.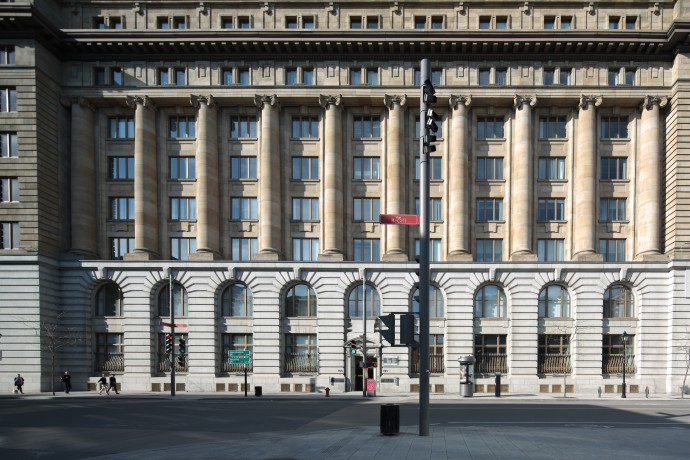
The second degree of freedom to set should be the rotation between the shift and tilt. This determines the orientation of the focus plane around the optical axis. A vertical tilt is tilts the focus plane away or towards the camera. A horizontal one tilts it left or right. In the case of the books above, a horizontal tilt is used. For architecture, horizontal can make an entire fence in focus for example.
The third degree to set is the tilt angle. This should be set while observing through the viewfinder since the effect is extremely difficult to predict. Actually, with a camera with Live-View, using that feature helps somewhat. Always set the tilt before the shift because – as mentioned above – tilting causes a shift.
The fourth degree to set is the shift. This is relatively easy to set but with old buildings that are not perfectly straight it is hard to get perfect. Again, Live-View can help here because the image can be seen at a higher magnification. The TS-E 17mm offers a catch here in that you cannot use the full shift and tilt extent together if both axis are aligned with each other. In such cases, Canon recommends that the tilt-angle plus shift-distance never exceed 12. With the axis perpendicular to each other, there is no such limitation.
Finally, the fifth degree of freedom to set is focus. Use DOF-Preview to really see how much the focus plane covers. Before firing the shot though, the TS-E 17mm has knobs to lock the tilt and shift in place. It is recommended to tighten those for the lens not to drift during the shot. Here is an example of a vertical shift and an horizontal tilt to minimize apparent depth of field.

All in all, using a tilt-shift lens opens up a lot of photographic possibilities. It takes a few days to start thinking in terms of shift and tilts but once you get started, the world looks different! Tilt is by far the hardest to predict and align with exactitude but maybe with more time it will be natural.
On a full-frame DSLR the TS-E 17mm F/4 gives a truly wide field-of-view but it also works on a cropped-sensor model as well. I used it with both and was glad to have more than one angle-of-view. Plenty of tilt-shift photos using this lens made it into my Canon EOS 5D Mark III review should you want to see full-resolution samples.