![]()
Hello readers! Welcome to the first installment of a new column here on Photography.BlogOverflow: Lightroom Fundamentals. With this series, I’ll hopefully bring helpful tips, tricks and insight into one of the most powerful and essential tools in any serious photographers toolbox: Adobe Photoshop Lightroom. We’ll start with the basics, covering what Lightroom is, how it is designed, and what a photographic editing workflow is. From there, we’ll move onto progressively more advanced topics, covering every aspect of this powerful editing tool. Some of the more advanced installments may also involve work with Adobe Photoshop, as there is very tight and seamless integration between the two products. Having a copy of Photoshop is not essential, and I’ll try to make sure any articles that involve it are clearly denoted. For the rest, its best to have a copy of Lightroom 3.x available. If you do not own the product, and cannot purchase it, you might want to give the free trial a go (the orange “Try” button to the right on this page. Note, the trial is limited, so you might want to wait for a bit, peruse through some of the articles, and try them out in a more compressed time-frame that fits within the trial). So, without further ado…

What is Lightroom?
Before diving right in, lets start with what Lightroom is. For anyone who is familiar with film processing in a literal darkroom…think of Lightroom as your digital darkroom. For everyone else, Lightroom is a tool designed to facilitate a digital photography development workflow. Modern digital cameras, namely DSLR type cameras, but also many of the new varieties of professional digital cameras that have arrived on the scene in recent years such as electronic viewfinder cameras, micro 4/3rds cameras, and any of a variety of interchangeable lens cameras without a reflex mirror and viewfinder, all support an image format called RAW. In the digital world, a RAW image is very much akin to a strip of film from an analog camera. In and of itself, it doesn’t look like much…and quite often cannot be directly viewed. A RAW image is simply a data dump of all the sensor pixels and camera settings from the moment a photograph was taken. Like film, a RAW image must be developed to produce a final photograph. However, unlike film…a RAW file is processed with software rather than chemicals, optical enlargers and photographic papers. Lightroom is that software. Lightroom is the darkroom of the digital age, the bit bath the turns your digital RAW images into artistic photographs enveloped in your own personal style, published to your preferred online exhibitions, and printed on the perfect paper of your choice.
Like many a darkroom, Lightroom is more than just a tool to develop photos and produce prints. It is also a tool to manage your photographic library, compare photographs and examine them in detail, publish your work to various online sites like Flickr or SmugMug, develop prints, and even create slide shows for PDF, video, or web. It provides an extensive set of tools to view and compare photos, organize photographs in collections, search your catalogs, and much more. Lightroom is a complete digital photography management, post-processing, and publication tool that meets the needs of all but the most demanding photographers who require exacting precision and total, unfettered control. To meet the needs of the latter, Lightroom also provides seamless integration with Adobe Photoshop, where you have access to more advanced editing tools, such as full curves, layered editing, and the full extent of Photoshop’s tools at your fingertips. Edits made in Photoshop appear in Lightroom, including those saved to TIFF or JPEG format. It should be made clear that while Lightroom offers an extensive set of tools for post-process development, its tools are sometimes less advanced than those found in Photoshop. One such tool is the Curves panel, which only supports a single curve, and does not have support for independent RGB curve editing. In other cases, Lightroom offers more advanced or effective tools than Photoshop. On example of this would be the noise reduction tool, which is truly superb. (Most of the Lightroom develop tool set can be found in Adobe Camera RAW, or ACR, which is part of Photoshop. ACR lacks the library management and print/publication features of Lightroom, however…and from a workflow standpoint is considerably less useful.)
Familiarizing Yourself with Lightroom
When you start Lightroom, you are presented with a nice, dark UI that is ideal for working long hours in front of a screen. The low light emission is easy on the eyes, and really helps your photography pop. Lightroom itself has a modular design, which lends itself well to a largely linear workflow. By workflow, I mean the process by which you import photos from your camera, organize them, develop them, and “publish” them to one or more sources (such as web and print.) Another popular image editing tool, Apple Aperture, generally provides a non-linear workflow, allowing you to perform just about any action at any time once images have been imported. There are pros and cons to both methods, a linear and non-linear workflow, and in many cases the two can compliment each other. Sadly, Aperture is only available on the Mac platform, and is therefor unavailable to the millions of PC users who might prefer a non-linear solution. So, for those of you who prefer linear, and those who are begrudgingly stuck with it, here is an introduction on Lightroom’s modular UI and a general overview of an efficient linear workflow.
![]()
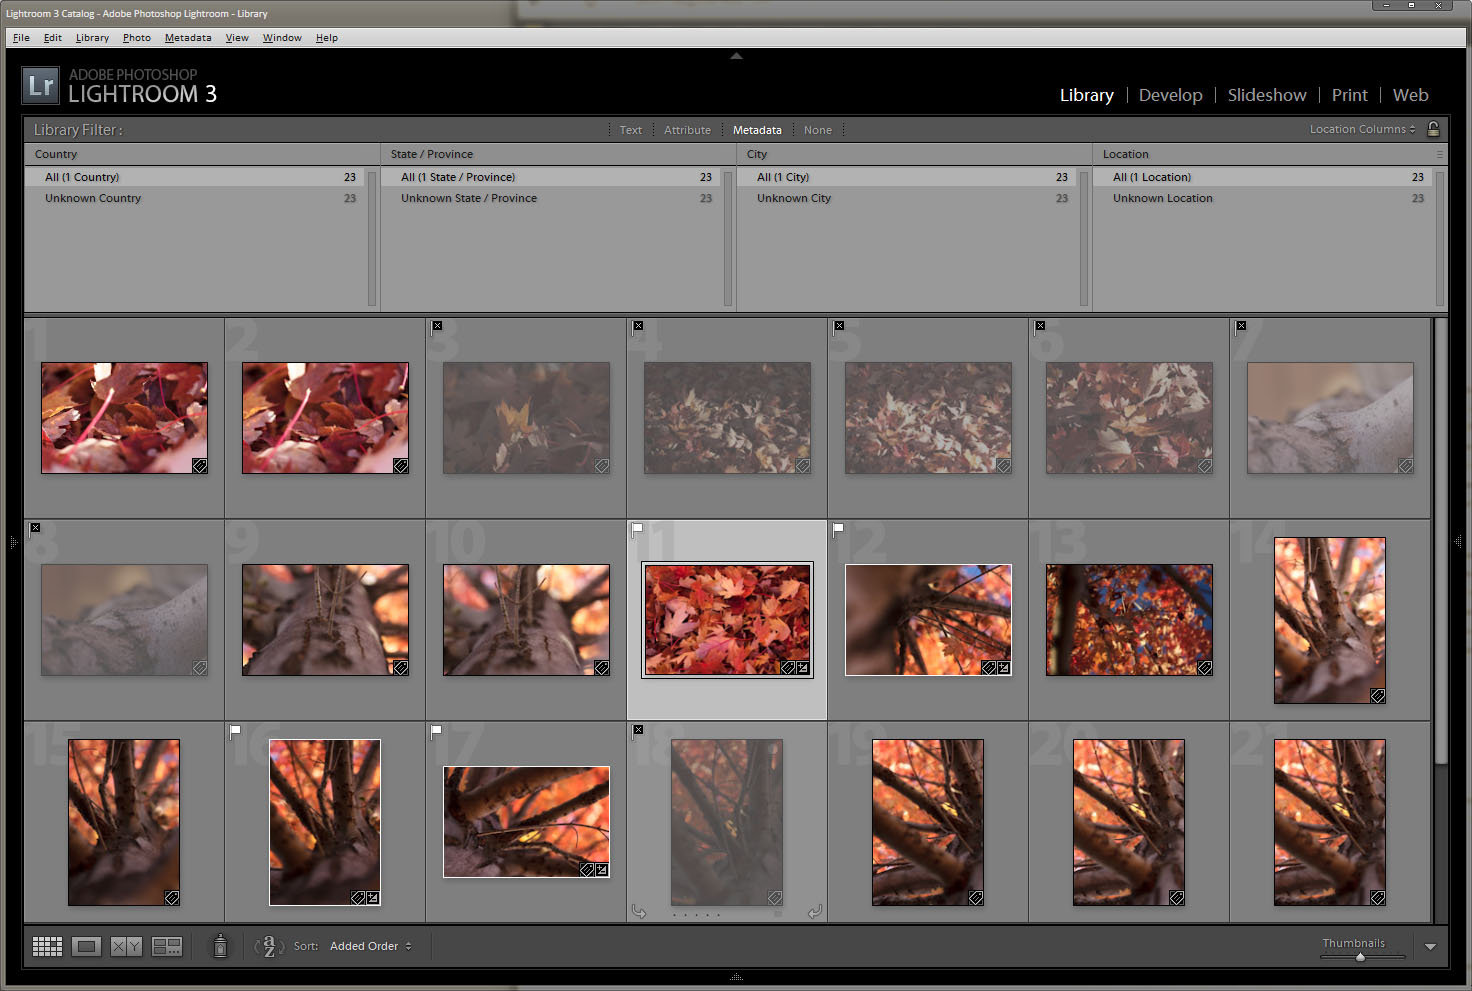
The Lightroom UI is divided into five separate modules: Library, Develop, Slideshow, Print, and Web. Each module is responsible for a specific, cohesive part of managing a digital photography workflow. The benefits of this modular design reveal themselves when you see how many tools are available in each module…which can be quite a few. Too many, in fact, to display them all at once, and still make them easy to find and use. (A contrary design might be found in Aperture, which always presents certain UI tools, and provides access to others via menus, hotkeys, etc.) Since any tool that involves photography is primarily focused on the photos themselves, Lightroom is optimized to provide as much screen space as possible to that end. The largest area of the Lightroom UI, the display surface or Viewport, is found in the center of the application. Your photos, either individually or as part of a grid, are always found here. Surrounding the viewport are the four primary control areas: The Module Picker above, the Panels to either side, and the Filmstrip below. Every module has the same layout, and the Module Picker and Filmstrip are always the same. The Panels change for each module, presenting a customized set of tools tuned for working within that module. There may also be additional tools embedded within the viewport, often along the bottom, possibly along the top or sides, depending on the module.
Lightroom’s UI is very flexible and customizable, and any part of the UI except for the viewport may be collapsed into the side it resides in. Lightroom may even be configured to run in full screen mode, using every scrap of available space to give you the maximum work area possible when working your photos. Continuing the flexible theme, Lightroom can be controlled by both the mouse and keyboard. Every command and tool available within the UI is accessible with the mouse, either via one of the panels or within a menu. Context menus with additional tools not present in a panel are often available by right-clicking a photo in the viewport or filmstrip, and sometimes by right-clicking a tool within a panel. Lightroom also provides an extensive set of keyboard shortcuts, or hotkeys, that can control many of the available commands. Hotkeys, combinations of keystrokes, allow quick access or application of commands without the need to scroll a panel or find a menu. Within Lightroom, some hotkeys are global and accessible from any module, while other hotkeys are specific to each module. You can discover the available hotkeys in one of three ways: by looking for keystroke combinations along the right-hand side of menus, by using the global hotkey CTRL+/ to display a non-intrusive popup containing module-specific hotkeys, or via the Lightroom help system by searching for “Keyboard Shortcuts” within Lightroom topics. I highly recommend users explore and learn the available hotkeys in Lightroom, at least for the modules that will be used most often. Keyboard shortcuts can greatly improve the efficiency of your workflow, particularly in cases where using a mouse is disruptive.

Working *with* Lightroom
Now that you have a cursory familiarity with Lightroom’s UI, its time to start learning how to use it effectively. The modular nature of Lightroom allows for an efficient use of screen space that highlights the photography…however it can also be quite disruptive to productivity if it is used incorrectly. Earlier I mentioned that Lightroom supports a largely linear workflow. At a high level, this is enforced by the order of the modules listed in the Module Picker: Library, Develop, Slideshow, Print, Web. These tabs can generally be translated into the following high-level task flow: Import > Organize > Develop > Publish. A new user is often inclined to import their photos within the Library module, and once that is finished, head strait to the Develop module to start tweaking. While not necessarily an invalid approach, later on down the road it can lead to a lot of manual digging through a large and growing library of photos to find past work. While the Develop module likely contains the key tools most photographers need to work with in most cases, it does not contain any of the photo management and organization tools. Neither do the other three modules. To find the necessary tools to manage and organize your photos, you must use the Library module. One could always return to the library after developing, or even during the development process.
Contrary to what may seem natural, a more efficient approach is to apply any metadata, decide your picks and rejects, and otherwise catalog as necessary to organize your photos immediately after import in the Library, before moving on to development. There are a couple reasons to approach library management this way. For one, after import you stay in the Library module, and all the photos you just imported are listed in the viewport. At this point, your photos are ideally prepped to be keyworded, have any additional metadata added to them, and appropriately culled. More importantly, however, is the nature of Lightroom’s Library module. Each set of photos imported is automatically listed in the “Previous Imports” collection. Any subsequent import will therefor override the prior import. Importing, developing, importing, developing, etc. can create a large backlog of photos that have little or no useful metadata associated with them, which makes finding them in the future a difficult and often frustrating process. Once an import has been updated with useful metadata, moving on to any other module for additional work is “safe”, and finding your work if necessary is usually a strait forward search, or possibly easier than that.
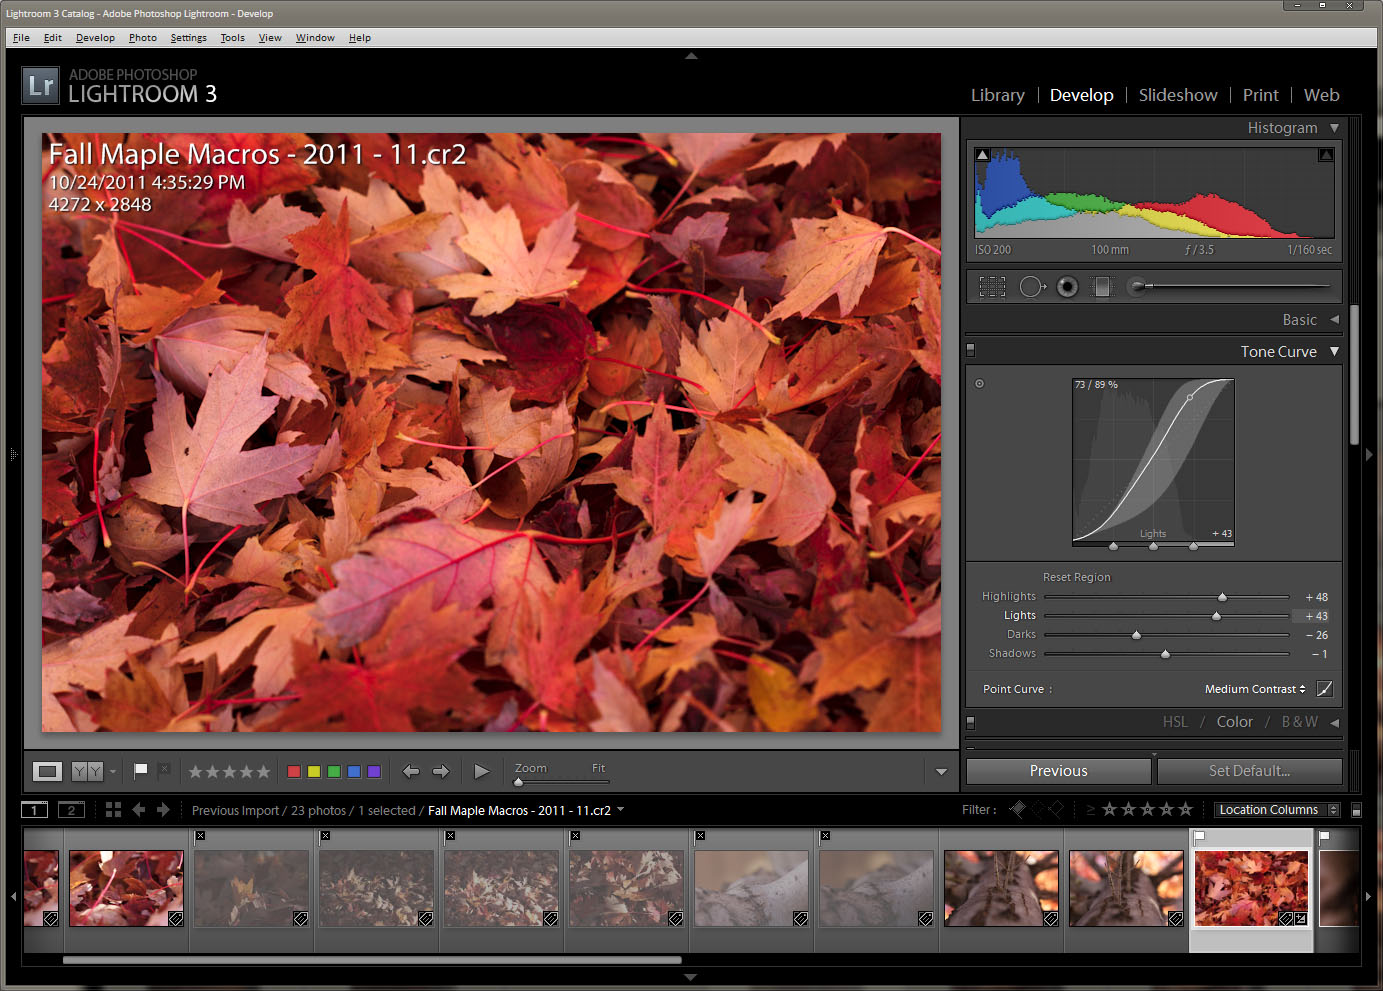
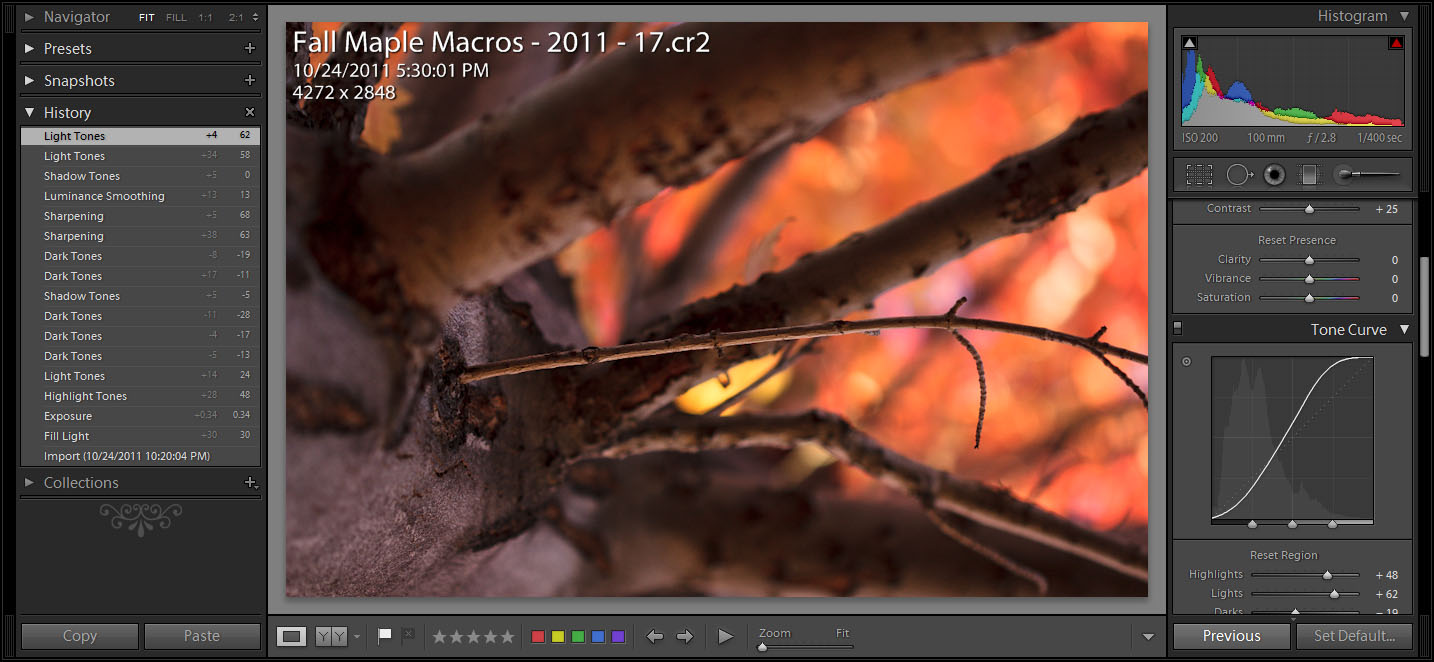
The Develop module is likely where most users will spend the bulk of their time. This is where you apply any edits you need to the photos you have imported and organized. The tool set available in this module is extensive, and the vast bulk of image editing can be performed here. There may be some cases where advanced users need more power, however in most cases the development tools should be sufficient to process most photos to your liking. RAW photo development with Lightroom is also a non-destructive process, and your original photo masters are always preserved in their original import location unless you explicitly choose to delete them. Each edit applied to a photo is atomic, and capable of being undone if necessary. One may even go backwards and forwards though a history of edits, and differences between points in time may be observed. Exposure control, basic curves, color adjustments and toning, detail tuning, camera adjustments such as lens corrections and tone curves, and much, much more can be edited in the Develop module.

Once an import has been fully developed, users can move on to the publication part of the process. Lightroom offers a variety of options for publishing your work. This includes creating Slideshows or Web Sites, uploading your work to online galleries like Flickr, SmugMug, and others, or printing your work. Publication should generally be the final step in your Lightroom workflow. You will generally want your photos to be fully developed before publishing them. Even if you are the type who prefers to do minimal post-processing work, there are always outliers where you over- or underexpose, did not have the shot aligned correctly, need a smidgen of color or toning work, etc. Once should always perform at least a cursory overview of your work in the development module before moving on to publishing. Once you are ready to publish, you have a wide variety of options. Lightroom’s publishing options support online publishing to various well-known photography sites, such as Flickr, SmugMug, and even FaceBook. Additional publishing plugins can be downloaded from Adobe’s Lightroom Exchange. A bit frustratingly, the publish plugins actually exist in the Library module, rather than within a more appropriate module. Additional publication options exist in the Slideshow, Print, and Web modules.

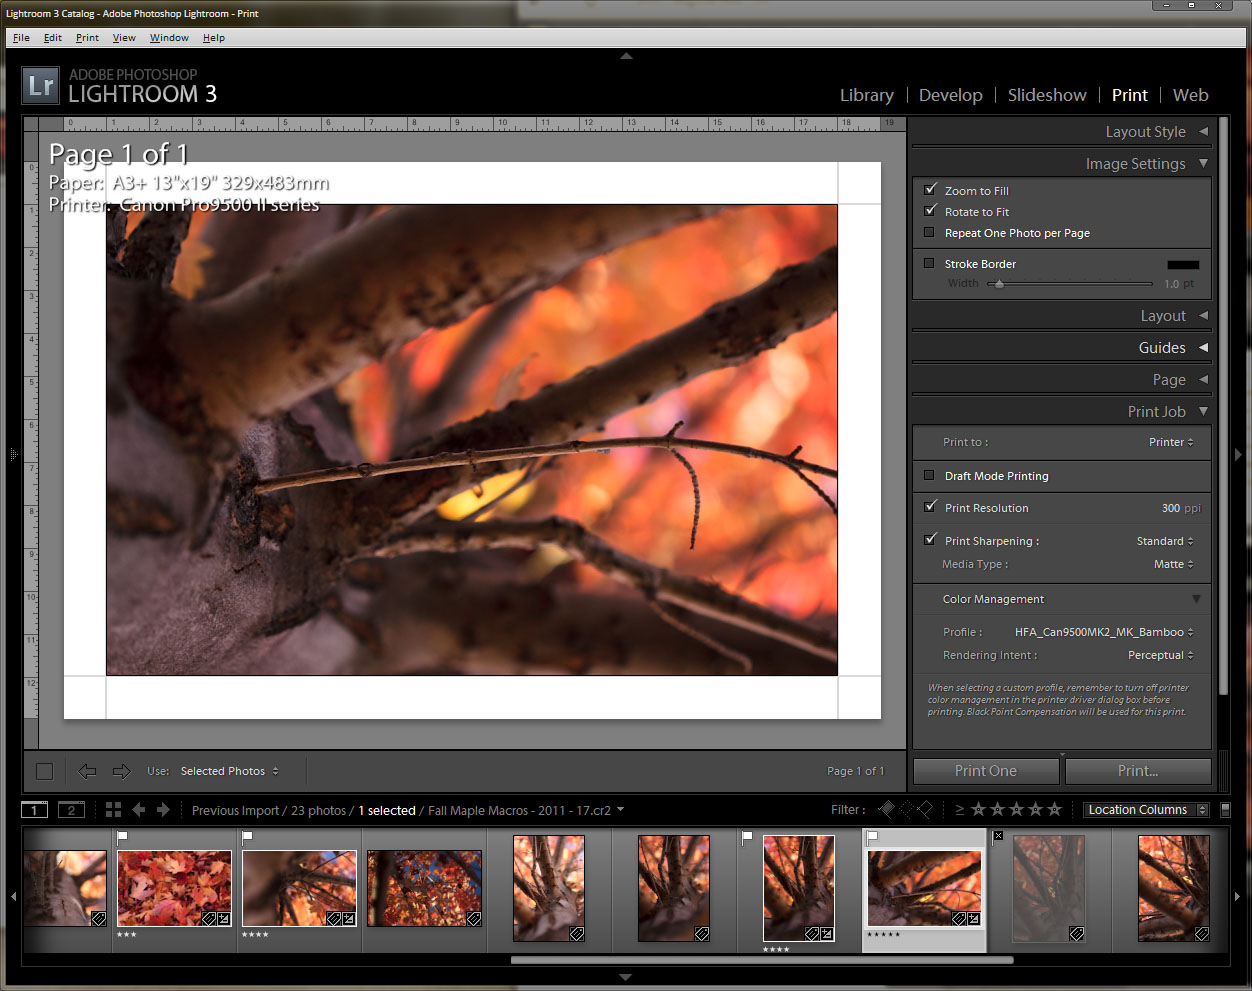
The Slideshow module allows you to create slideshows from any photo in your library, with the optional addition of some metadata such as the photographer, camera settings info, etc. Slideshows may be published to PDF or video in MP4 format up to 1080p resolution. The Web module provides a quick and easy way to create whole entire websites to showcase your photography. It contains a useful variety of templates that can be used to display your photography in the best complimentary format. Both straightforward HTML as well as Flash designs are supported. A handy layout alternative to HTML and Flash called “Alright” allow you to create very professional exhibitions of your work that can be uploaded to your personal websites at your own domain name. Publication to the web is supported via FTP. Finally, the Print module provides a basic but extremely useful tool to print your work. Unlike Photoshop, Lightroom’s layout capabilities are very advanced, allowing you total control over paper size, margins, even multi-photo layout grids with text and metadata options. Lightroom provides full control over print resolution, ICM, etc. for printing on custom papers and fine art papers. Unlike Photoshop, Lightroom does not offer any color and gamut correction tools, so if you require the best print with the best color and tone rendition possible, using Photoshop or your preferred RIP is still the better option.
Future Installments
Hopefully this introduction and overview of Lightroom’s built-in workflow support will help you get started using Lightroom effectively. Lightroom is an extensive program with many complex options and tools that will take some time to fully explore. It can take months to fully learn all it has to offer, and even then, you’ll find yourself learning of new tools and new tricks a year or two down the road. More installments to this column are planned for the future, and will explore in detail the major modules of Lightroom, as well as it’s integration with Photoshop and even some of its publish plugins. As each module is a fairly extensive tool in and of itself, there will likely be several articles dedicated to each one. Articles will follow the natural process that Lightroom best supports, as described above, starting with photo import, working through library organization and management, a detailed exploration of photo development, and finally ending with the various publish plugins and modules and all they have to offer. I would also like to open up a channel for recommendations, tips and tricks, and any other knowledge readers may have about Lightroom. I know a fair bit of tips and tricks myself, however I have by no means explored every tool, setting, command, or option available in Lightroom. I would also like insight into other photographers approach to using Lightroom for all kinds of photography, as I primarily do nature and landscape photography myself. I also wish to encourage anyone who wishes to contribute any blogs on Lightroom to forge forward and do so! This column need not be the only source of Lightroom knowledge published to our blog. Happy reading!
Filed under Columns Lightroom Fundamentals
Tagged: lightroom, Post Processing, workflow
Good lord, could that writing have been any more dense? Try writing for the web next time if you actually want people to read it. Short paragraphs. Bullet points. Scanability. Surely you’ve heard of these concepts? Jakob Nielsen cracked the code waaaaayyy back in 1997, but it looks like you could use a refresher: http://www.useit.com/alertbox/9703b.html
First of all, you are right, that was written WAAAY back in 1997. An average monitor in 1997 was probably 15″, 800×600, and horrible to look at for any amount of time. That article is completely dated in every way possible. People are reading things on iPads, iPhones, Android, 2560×1440 Apple Thunderbolt displays, and the like. Nice constructive criticism! This is a group blog, you do better!
@ARegularReader: Well, first, you might try one of those books on etiquette…seems like you could use a bit of a refresher yourself. 😉 Second, I know this is currently a wall of text, however I have no intention of leaving it that way. I promised our resident blog manager that I would get this article published by Sunday, and to do that I had to publish without any screenshots. I intend to add several to break up the article as soon as I can, however I do have other responsibilities in life as well…not the least of which is moderating PhotoSE itself. So, show a little respect, and the task of reading this article will improve in a couple days.
jrista, great article! I should take the advice that you give and actually spend some time tagging and adding metadata up front, but man is that hard!
One thing I think would make sense to point out even in this introductory article, is that you should really cull photos in the Library module and not the Develop module. It is much, much faster to view the JPEG previews in the Library module and rate or categorize your images as opposed to the Develop module which grabs the full RAW image. So before heading to develop to play with sliders, stick in Library to cull!
In fact, you can cull in the Library by just merely clicking on X to ‘Reject’ and then you can simply delete all the rejects through the menu.
Thanks! I will definitely address culling in detail when I describe the import process. Culling is a specific aspect of library management, and I did not want to go into extensive detail about specific parts of the larger workflow in this article. Don’t worry though, culling will be a critical part of one of the next two articles (not sure if I want to include that as part of the import step, or as part of the initial library management that immediately follows import).
The next article in this column will be about the Import process in Lightroom. If anyone has tips, tricks, or a little gem of uncommon insight about the import tool, please respond here! I would like to incorporate as much knowledge as I can about the Import screen.
I appreciated the in-depth look. 3 bullet points may be “web writing” but those with short attention spans, but it doesn’t convey much useful information.