Posts Tagged ‘canon’
Tilt-Shift Basics With the Canon TS-E 17mm F/4
Thanks to the Gear Lending Library, I got the chance to try a tilt-shift lens for the first time. Considering myself a wide-angle shooter, I decided to go with the Canon TS-E 17mm F/4 which is the widest tilt-shift lens currently in production. It is also one of the most complex lenses to control since it has 5 inter-related degrees of freedom.
Tilt-Shift Basics
A tilt-shift lens, as obvious as it may seem is a lens which can both tilt and shift. It is possible to have lenses which does one or the other but the major lens makers don’t make such thing. To show what his means, lets start with the shift and my living room.
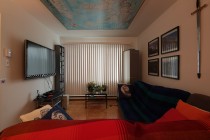
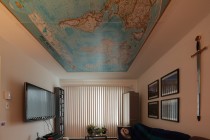
Just below on the left is an image taken with the camera level and the lens in its unshifted position. Now suppose that the couch near the camera was glued to the floor (it feels that way at least) but I wanted an unobstructed view of the window. With a normal lens, all it takes is to tilt the camera up. The result is what you see in the middle. While we no longer see the cough, the room shows some severe perspective distortion, also known as converging verticals. With a tilt-shift lens, there is another possibility meant exactly for this situation: Simply shift the lens upwards. This avoids converging verticals, as seen on the right, because the camera is still level, only the lens has moved up.

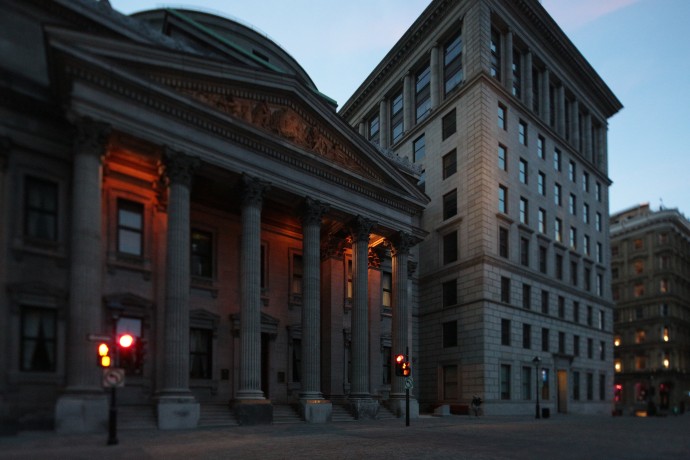
The shift feature is extremely useful of architecture photography where it is important to keep the geometry of buildings looking real.
The tilt feature allows to tilt the lens to an angle relative to the camera. What this does it tilt the focus plane. With a normal lens, the focus plane is always parallel to the camera, meaning that everything at a certain distance is in focus. By tilting the focus plane, this no longer holds. Specifically, everything in focus still lies on a plane by that plane is no longer parallel to the camera sensor.
It is hard to conceive and results are sometimes surprising since the plane of focus tilts by an angle which depends on the focal-length, focus-distance and tilt-angle as illustrated in the answer to this question. In the case of the TS-E 17mm F/4, the tilt-angle moves ±6.5°. To illustrate what happens as the lens is shifted, here is a demo of the lens being shifted in 1° intervals.

Note thatf at one point, the plane of focus coincides with the angle of the book faces. At the other extreme, the depth-of-field appears extremely shallow because the focus plane is tilted away from the books.
One artifact which may be limited to some tilt-shift lenses is that changing tilt cause a shift of the angle-of-view. Another member confirmed this is also the case for the Canon TS-E 24mm F/3.5 lens.
Using The Canon TS-E 17mm F/4
Tilt-shift lenses are completely manual except for aperture control which is done by the camera. Tilt and shift have to be controlled manually and so does focus. Now, because the effect of tilt and shift are direction dependent, Canon offers 2 additional controls on their TS-E lenses. One is the lens angle which can be rotated entirely around its optical axis. The second is another rotation between the tilt and shift component. This allows the direction of tilt and shift to be changed relative to each other.
One thing learned early on with the TS-E 17mm is that focus changes with just about any change. Therefore, focus should really be set last among all 5 degrees of freedom. However, before starting to setup the lens, you must meter the scene. To do that, point the camera at the subject with the lens in normal position and take a reading. Adjust to taste and dial those in Manual mode. This is important because once the lens is tilted or shifted, metering no longer works properly and can under-expose by over 3 stops.
The first degree to set should be the rotation of the entire lens. It controls in which direction the shift will occur. A vertical shift is good to avoid converging verticals and a horizontal shift for converging horizontals. Keep the shift plane at an angle is also possible and correct both but since motion is becomes related you have to keep repositioning the camera which gets annoying. Still it eventually works as illustrated in this example which used a 30° angle from horizontal.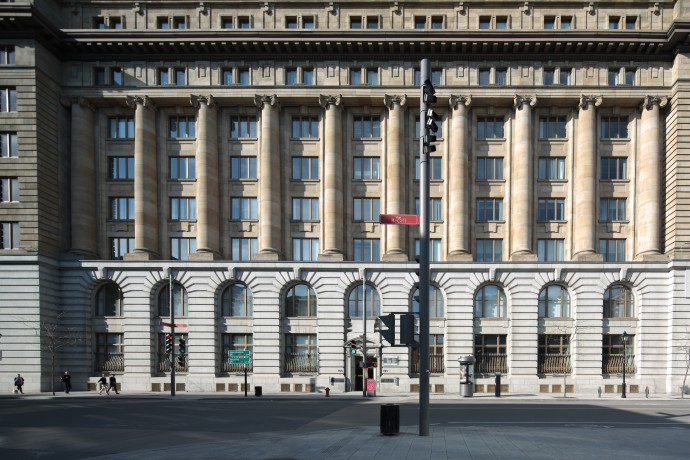
The second degree of freedom to set should be the rotation between the shift and tilt. This determines the orientation of the focus plane around the optical axis. A vertical tilt is tilts the focus plane away or towards the camera. A horizontal one tilts it left or right. In the case of the books above, a horizontal tilt is used. For architecture, horizontal can make an entire fence in focus for example.
The third degree to set is the tilt angle. This should be set while observing through the viewfinder since the effect is extremely difficult to predict. Actually, with a camera with Live-View, using that feature helps somewhat. Always set the tilt before the shift because – as mentioned above – tilting causes a shift.
The fourth degree to set is the shift. This is relatively easy to set but with old buildings that are not perfectly straight it is hard to get perfect. Again, Live-View can help here because the image can be seen at a higher magnification. The TS-E 17mm offers a catch here in that you cannot use the full shift and tilt extent together if both axis are aligned with each other. In such cases, Canon recommends that the tilt-angle plus shift-distance never exceed 12. With the axis perpendicular to each other, there is no such limitation.
Finally, the fifth degree of freedom to set is focus. Use DOF-Preview to really see how much the focus plane covers. Before firing the shot though, the TS-E 17mm has knobs to lock the tilt and shift in place. It is recommended to tighten those for the lens not to drift during the shot. Here is an example of a vertical shift and an horizontal tilt to minimize apparent depth of field.
All in all, using a tilt-shift lens opens up a lot of photographic possibilities. It takes a few days to start thinking in terms of shift and tilts but once you get started, the world looks different! Tilt is by far the hardest to predict and align with exactitude but maybe with more time it will be natural.
On a full-frame DSLR the TS-E 17mm F/4 gives a truly wide field-of-view but it also works on a cropped-sensor model as well. I used it with both and was glad to have more than one angle-of-view. Plenty of tilt-shift photos using this lens made it into my Canon EOS 5D Mark III review should you want to see full-resolution samples.
Canon MP-E 65mm F/2.8 1-5X Macro Lens Experience
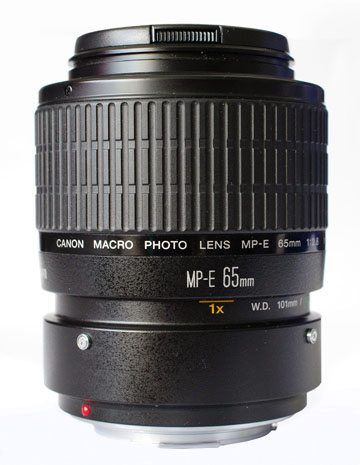
As part of the Photography Gear Lending Library experiment, I rented the Canon MP-E 65mm F/2.8 1-5X Macro lens. This is an ultra-high magnification macro lens unique to Canon, designed for extreme macro photography. This lens is equally powerful as it is difficult to use. Lets start by how the lens works and go on to how to use it.
Macro Power
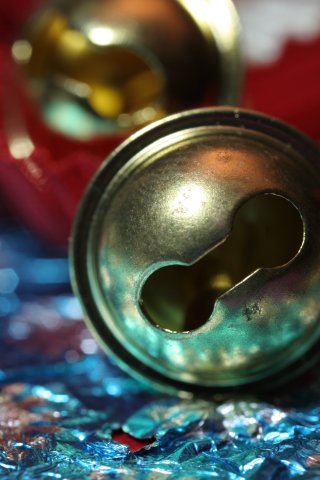
While most macro lenses have a maximum magnification of 1X, this is the minimum magnification of the MP-E 65mm. Its maximum magnification is an incredible 5X. This means the Canon MP-E 65mm F/2.8 1-5X Macro can fill the frame with a subject which is five times smaller in size or 25 times smaller in terms of area compared to a 1X magnification lens.
The MP-E 65mm fits all Canon DSLRs. Like a handful of modern specialty lenses, this is a manual-focus only lens. It does transmit focus-distance information to the camera though. Given how razor-thin depth-of-field is at very close focus distances, it is natural to focus manually when doing macro photography, so the lack of autofocus should be considered part of the craft rather than a limitation.
The complete specifications of the Canon MP-E 65mm F/2.8 1-5X Macro lens hide a few oddities. The first one, which may be obvious to some, is that this lens has a maximum focus distance in addition to a minimum – which all lenses have. Also, this one reaches its maximum magnification of 5X at its maximum focus distance and its minimum magnification of 1X at its minimum focus distance, which is the opposite of most lenses. Remember that focus distances for DSLR and other ILCs are measured from the sensor plane. Fixed lens cameras normally measure focus distance from the front lens element which is what Canon calls working distance.
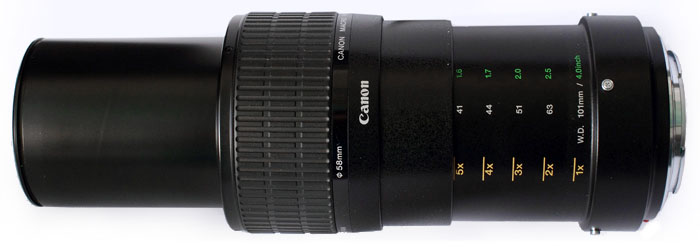
The working distance of this special lens starts at 101mm at 1X magnification and drops to 41mm at 5X magnification, which follows conventional logic since the lens extends significantly while focusing. This is a critical aspect of using the lens as will be detailed further. This very short working distance precludes the use of a lens hood which the MP-E 65mm does not support. However, it does support 58mm screw-on filters.
While this lens reports a maximum aperture of F/2.8 regardless of focus-distance, and a minimum of F/16, its light transmission varies significantly with magnification. Going from 1X magnification to 5X requires roughly 8 times (3 stops) more light to maintain the same exposure. This produces a similar effect, but less pronounced, than using extension tubes to increase magnification.
Magnification Issues
Using the MP-E 65mm is more involved than using a standard 1X macro lens. The extreme magnification of this lens poses the most challenges. Magnification not only makes your subjects bigger, it also magnifies the effects of movement. When framing a subject, the lens must be positioned with great precision. Being a few millimeters off causes the entire image to blur out, making it rather difficult to fine-tune composition. As the lens is adjusted, the subject distance changes which often requires the camera to be moved as well.
 Unlike most lenses, changing focus with the MP-E 65mm drastically changes framing. This means that it is easier to focus first (which sets the magnification) and then adjust the camera-to-subject distance. Of course, knowing which magnification to set ahead of time is not easy. It can be estimated knowing the size of the camera sensor. For example, full-frame DSLRs have sensors which measure 36mm x 24mm. At 2X magnification, a subject of 18mm x 12mm would fill the frame, while at 5X a 7.2mm x 4.8mm subject would fill it.
Ideally, precise positioning requires a tripod. This keeps the camera in a set position while adjusting settings. Although a tripod isolates the camera from the photographer’s movements, it remains susceptible to vibrations which are highly amplified by the magnification of this lens. The use of a remote trigger and mirror-lockup (MLU) are absolutely essential to diminish shake.
This Canon lens comes with a tripod collar which is normally found on long telephoto lenses. However, this lens extends significantly (by about 13cm) while focusing which adds strain to the tripod head and can easily cause drift. Using the supplied collar improves balance, reduces shake and makes the whole setup easier to maneuver.
Positioning Challenges
The challenge of obtaining a good composition is different in a controlled environment than hand-held. Given the choice, shooting from a tripod is clearly better. However, with sufficient light or astronomical ISO sensitivities, it is possible to use this lens without a tripod.
To shoot hand-held, it is probably easiest to start with a good estimate of magnification. After setting magnification on the lens, move the camera back and forth until the desired subject is in focus. Should framing not be perfect, magnification must be adjusted again and the camera focused by moving towards or away from the subject. Repeat until a satisfactory composition is found with the right focus point.
Tripod shooting follows the same principle except that camera movements are much more restricted. At the very least, an easy-to-adjust tripod head is required. A good quality ball-head makes a big difference here. The most recommended accessory would be a macro focusing rail which attaches between the tripod head and the camera. This is a device that moves the camera parallel to the lens by adjusting a knob. It saves a lot of time and aggravation compared to having to reposition the entire setup.
In some cases, one can move the subject to get the right composition but not all subjects can be moved or convinced to do so. Moving the subject also highlights the challenge of macro lighting. The simplest but least flexible is to use a dedicated macro flash which mounts to the lens. The great thing about this is that illumination always follows the camera. This limits results to front illumination which is far from ideal for most subjects. The more flexible and challenging approach is to use off-camera lighting.
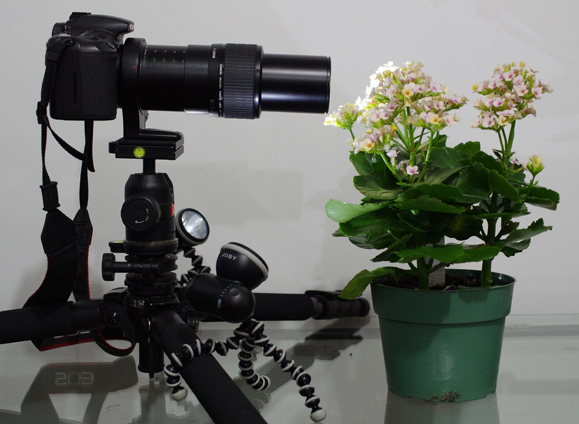
Illumination power is not usually a problem for macro photography. The true difficulty is in the positioning of lights. The biggest obstacle to light placement is the lens which easily projects a shadow onto macro subjects. To avoid this, lights must be positioned very precisely or very diffused. Using desk-lamps is one option but it is difficult to get predictable automatic metering and white-balance with those. Instead, the solution I found was a flexible LED lamp called a Gorillatorch. The model which I acquired two of outputs 65 lumens and has bendable magnetic legs which can attach to almost any surface. A joint below the lamp-part makes positioning a breeze. The whole thing is waterproof and runs up to 80 hours on 3 standard AA batteries.
Conclusion
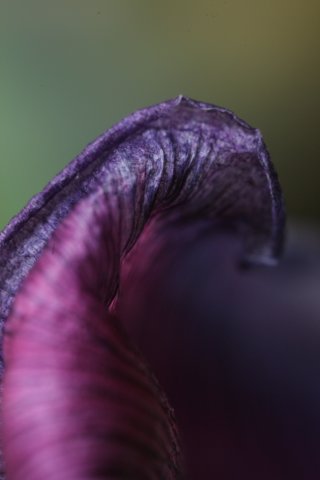
The Canon MP-E 65mm F/2.8 1-5X Macro lens is an incredibly powerful macro lens which rewards patient photographers with a fascinating view of things. It provides an all-in-one solution for high magnification photography without as much reduction in light transmission as extension tubes. The lens leaves a lasting impression of quality in both its construction and the images it produces.