![]()

Take shots like this with just a few household items
In my last post I explained how to get into macro photography cheaply and easily using a reversing ring. This time, I’m going to show you a quick and interesting way to use the reversing ring that’s a bit different from the usual flowers and insects!
It’s amazing how different everyday things can look when seen really close up. For this project we’re going to use things you can find in any kitchen to create some funky, colourful abstract photos. Here’s what you’ll need:
- A camera, tripod and reversing ring
- An 18-55mm kit lens with the aperture ‘hacked’ open (see the reversing ring article)
- A shallow, clear glass dish or ramekin
- Vegetable or olive oil
- A CD (or DVD)
- A flashlight/torch
- A toothpick or chopstick
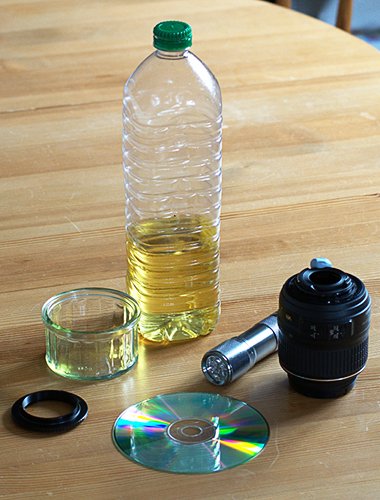
This is all you need to make fantastic abstract shots
Firstly, fill your dish with ordinary water.Place the CD label-side down on the edge of a table, or wherever you can put it so that you can position the camera directly over it on the tripod, then put the dish on top of it. Attach the camera to the tripod and position it at roughly the right height and angle; remember you need to get really close to your subject when using a reversing ring.
Once it’s set up, move it out of the way so you don’t get oil or water on your camera.Now drip some oil into the water, the more the merrier. Be sure to drip rather than pour it, as you want to create plenty of separate drops, not a uniform layer of oil. Take your toothpick or chopstick and give the oil and water a good mix, to create lots of little bubbles. Then let it rest a little so it begins to stop moving and some larger bubbles can coagulate.
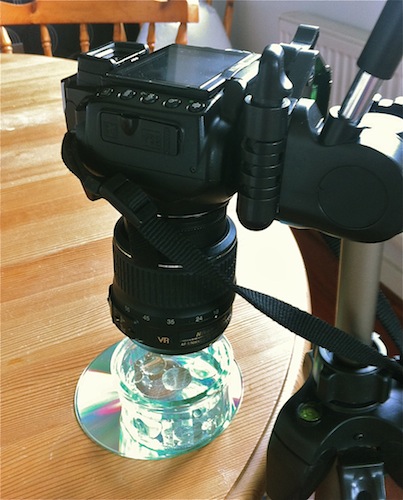
A tripod is essential for maintaining sharp focus
Now, grab your camera and get it back in position; be careful not to get water or oil on it or the lens. Use the zoom function of your lens and the height adjustment on your tripod to focus on the bubbles – remember the depth of field is very narrow with macro photography, so make small adjustments. Once you’re happy the bubbles are in focus, take a couple of test shots to get roughly the right exposure (remember the camera needs to be in Manual mode). Then grab the flashlight and turn it on. While looking through the viewfinder (or using live view), shine the flashlight on the CD from various angles until you get a nice ‘rainbow’ of colour underneath the dish. The bubbles will refract and focus this rainbow to create some great effects. Then take another shot, adjusting the exposure if necessary.
Once you’ve got the light angle and exposure right, you can then play around and find a nice cluster of bubbles that give a pleasing composition. The easiest way to do this is to simply slide the CD around the table. Eventually the small bubbles will start to reform into fewer, bigger bubbles, in which case simply move the camera and give it another stir.

Stirring the oil and water results in a variety of bubble sizes
That’s all there is to it – happy snapping!
Filed under Columns On the Cheap Rainy Days
Subscribe to comments with RSS.
Comments have been closed for this post