![]()
Shooting water drops is a fun way to wile away an afternoon with your camera. As with just about anything to do with photography, you can spend as much as you like on equipment to do it. But you can get some excellent results with relatively basic equipment, with a little bit of practice, and the tips in this article.
What You’ll Need
- A DSLR – or a film SLR, if you have lots of film and don’t mind waiting.
- A longish lens – while you can use a relatively short lens like an 18-55 kit, you will need to heavily crop the shots, limiting the size you can display them at. I would say a 200mm lens is a minimum for really good results. All the shots in this article were taken with a 300mm lens. You can also use a shorter macro lens, but remember there’s water splashing around – you may want to improvise a waterproof cover with a plastic bag.
- A tripod – you’ll be shooting indoors, and you’ll be holding a bottle with one hand, so you’ll need a tripod to hold the camera. It doesn’t have to be brilliant, just a bog-standard model.
- If you have it, a speedlight/flashgun with some kind of off-camera capability (including a stand). For the photos in this article I used a dirt-cheap TTL flashgun and a TTL cable fixed to a cheap tripod. If you don’t have a TTL cable, just put the flashgun on the camera. If you don’t have a flashgun, use the pop-up flash on your camera.
- If you have it, a remote or cable release – it makes things easier, but it’s not essential.
- A clear bowl or jug.
- A pencil, pen, or chopstick.
- A plastic bottle – You can also use a plastic bag, but they’re a bit harder to handle.
- A pin.
- A piece of coloured card or plastic – to use as a backdrop. For the photos in this article I used a flexible chopping board from Ikea, but you can use anything you like.
- A towel.
Set Up
You’ll be dealing with water, so the best place to set up is the kitchen. Fill the bowl/jug with water to the brim, and set up your backdrop behind it.
Set up the camera on the tripod with the camera pointing down on the jug at an angle, not too steep, but not so shallow that you can see the edges of the bowl if possible. There will be water splashing around the place, so be careful not to position the camera so close that you run the risk of splashing it.
If you are using off-camera flash, set it up so that it’s level with the bowl and pointing at it and slightly upwards for punchy contrast and highlights. If you’re using on-camera flash, just point at the jug. You can also try bouncing the flash off a wall or ceiling for a different effect. Either way, be careful of splashes – you can easily put a clear plastic bag over the flashgun to protect it.
As you’ll be using the flash, turn off the lights.
Set the Camera
Pre-focus the camera: place the pencil/pen/chopstick across the middle of the bowl, switch the camera to manual focus, zoom in and adjust the focus until the pencil is sharp. Either leave the lens on manual focus or use your camera’s focus lock feature to ensure the camera doesn’t try and refocus.
Turn your flash on (or pop up your on-camera flash). Set the camera to Manual, allowing maximum control of exposure. Dial in the maximum shutter speed your flash will allow – usually around 1/200 or 1/250 for a normally lit room. If its completely dark and you expose just for flash, set your exposure for any value – even a few seconds – the flash will freeze the drops. To get a decent depth of field (avoiding part of your drops being out of focus), dial in an aperture of f8-f11. Set the ISO to 100 or 200, to keep noise to a minimum. If you’re using a remote, set the camera to be triggered by it.
How you set your flash will depend on what options your particular model gives you. For the shots in this article, I used a TTL flash with flash compensation set to -0.7. Experiment with the settings on your flash for best results.

Taking the Shot
Take the pin and use it to – carefully – poke a hole in the bottom of the bottle. Fill the bottle with water, and position it over the jug so that the drops are hitting the pencil. Start about 30cm/12” above the bowl and then raise the bottle up – the higher it is, the bigger and more spectacular the drops. Once you’ve got the drops consistently hitting the same spot, remove the pencil with your other hand and grab either your remote or the shutter button on the camera.
The tricky bit now is firing at just the right moment to capture a drop in mid air. This will depend on the height of the bottle above the water – just experiment a little, and you’ll soon be timing it well enough to get some decent shots. With the room normally lit, you’ll fire the shutter and the flash will go off. With a dark room, fire the shutter and then any time during the exposure, fire the flash separately to freeze the drops. Then it’s just a matter of snapping away until your flash’s batteries run out or your memory card fills up!
Post Processing Tips
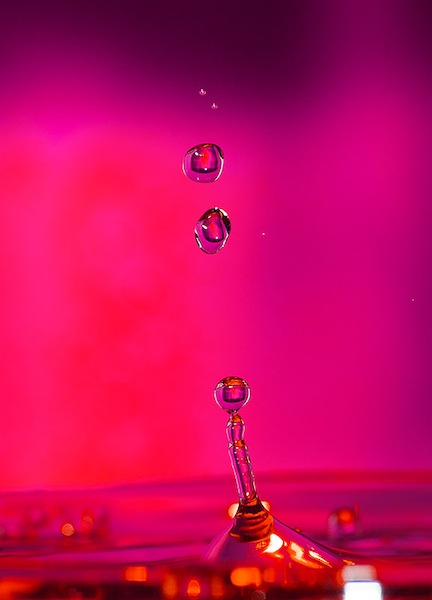
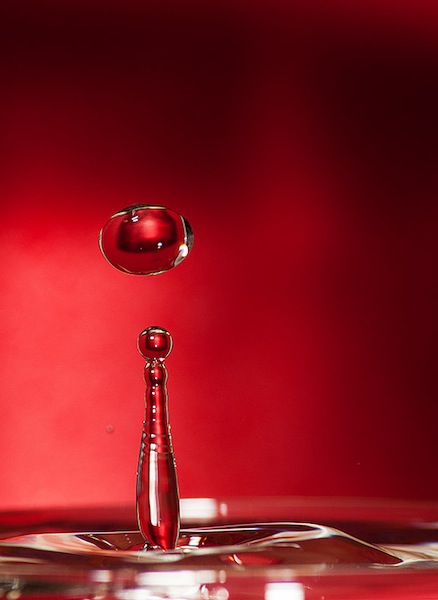
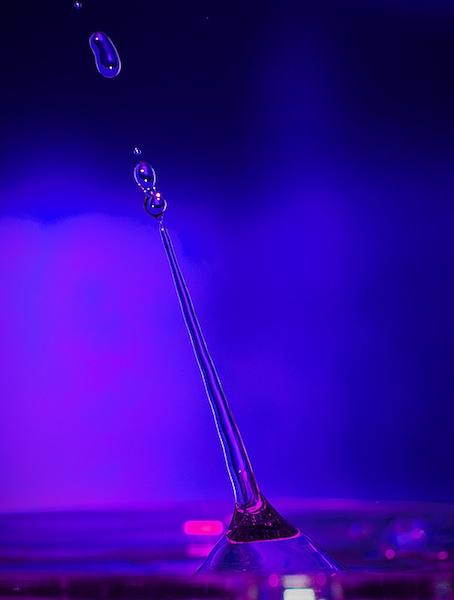
Water drop shots benefit from plenty of sharpening and contrast boosts. They are great candidates for creative post-processing – for example, all the shots on this page were taken with a red backdrop, but just a few minutes work with colour balance and I’ve produced a whole range of colours.
Taking It Further
If you enjoyed taking water drop shots, you can get even better results with some more equipment. Firstly, a stand to hold the bottle will not only free up a hand, but also make sure the drop will always hit the water in the same spot.
To get spectacular drops, you can use a mix of glycerin and water. Glycerin is clear but more viscous than water, resulting in some amazing ‘double drop’ and ‘umbrella’ effects. It is available from pharmacists (it’s the main component of cough syrup). You can experiment with different proportions of glycerin to water – 1 part glycerin to 2 parts water is a good starting point.
You can also use milk to give a different effect, or add food colouring to whatever liquid you’re using. You can even add one colour to the drop water and another to the bowl water. Adding a colour gel to your flashgun adds another dimension too.
Finally, if you’re really serious, you can buy or improvise a valve or tap system to precisely control the flow of water drops, which will allow you to force drops to hit each other for some really amazing results.
Good luck, and have fun.
Filed under Rainy Days
Great article!
I’ve found if you fill the bowl to the brim, as you suggest, you get nice round drops like you have pictured. If you want the “crowns” you see of milk drops, it’s best to have little or nothing in the dish (I use a plate). You want the drop to splash, so shallow is better for those shots.
I bounce my flash off a card or a coloured towel. It’s fun to put different colours in the background – patterned tea towels for instance – and you get interesting colours in the drops.